As a boy in the 80's, I wanted to design and build a computer. Not having the resources to do so, I eventually got my parents to buy me the cheapest computer available - a Timex Sinclair. Thus began my career as a programmer.
But I never forgot my first love: hardware.
Now my kids are of the age where they are exploring and inventing and creating things. I want them to be able to have the ability to learn about computers the way I did, but with the advantage of modern technology. And do it affordably.
The last computer I bought was a very nice Macbook Pro which is still with us after 6 years. It came time for me to consider what my next computer was going to be. Not having really built anything in years, I wondered if I could build a usable laptop computer. There are some great projects out there in this vein, like the Pi-Top (
https://www.indiegogo.com/projects/pi-top-a-raspberry-pi-laptop-you-build-yourself/x/9983776).
But I wanted to do something with available products. I also wanted to be a little more unique, stylistically. Don't get me wrong. The 3D printed Pi-Top case is awesome, if generic looking. My original idea (and still an end goal) was to make a steampunk styled machine using a combination of old and new parts, metal and leather, but usable as my "daily driver".
I also wanted to start small, not getting the whole package at once. I wanted to piece it together, recycling where I could, buying new parts where needed. I wanted to prototype it. I wanted to involve my kids in a way more than just "watch me put together this computer".
My kids are home-schooled. They get all their educational materials delivered to us in the mail. Much of their paper and book supplies come in a handy box about 2.5" tall and a bit bigger than a sheet of paper. This box is printed with admonitions to recycle the box by using it in some creative way, and so we used them for storing materials and other projects.
It occurred to me this was about the same size as a laptop. I took one and started putting what I needed to make a computer into it...
I need the following hardware:
- single board computer. Initially a Raspberry PI, but also looking at other options like ODROID and Bananna PI, etc. I would like to have documentation (from experience) on how to hook up any of the popular boards. I have a 1st generation PI model B but its only good enough for the kids likely.
- LCD screen. I have a few old laptops I plan to salvage LCD's from, it remains to be seen which ones I can get working. I may have to purchase something.
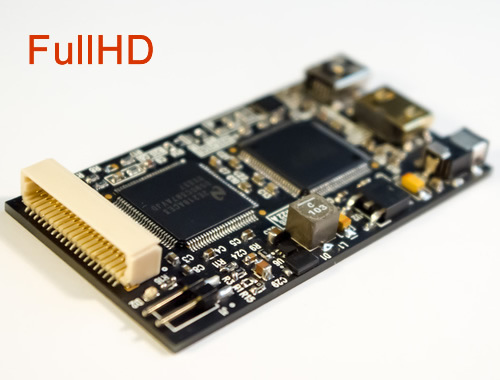
- HDMI to LVDS converter. I have a source for a board.
- Battery/power management. I have a source for a board but it does not handle charging.
- Batteries.
 Here it is! I'm surprised to have received this already as it was shipped from Malasia. Just a tiny little thing. It helpfully came with the female connector and the crimp contacts (which you can see above my hand). All I need to do is cut the end off the cable on the LCD and connect the right wires.